With the release of version 1.6.0, Link Whisper will now allow you to connect sites together so you can make Outbound Links between sites. Each site needs to have an active and licensed copy of Link Whisper installed on it to make the connection.
Currently, Inbound Links between sites isn’t supported but we are considering adding it if the response to the Outbound links is positive. If you find the cross-site Outbound Linking useful and cross-site Inbound Linking is something you would like to have, please let us know via the support form.
Video Tutorial on How to Interlink External Sites.
Connecting the sites.
To connect two or more sites together will require creating a shared access code so all the sites can identify each other, and the sites will need to be registered with each other.
Something to note, only sites that are in the same license can be connected. This is because a license check is part of the authentication process to make sure that all of the sites belong to the same user. So if you have 10 sites licensed in the 10 license plan, all of those sites can be connected together. But if you have 3 sites with 3 separate single site licenses, the sites won’t be able to connect because there’s no way to tell if they belong to the same user or not.
In this tutorial, we’ll be connecting 2 sites together to keep the tutorial clear and to the point. There isn’t a hard limit to how many sites can be connected to each other so you could create a network of 7 or 8 sites all connected to each other if that suited your purposes.
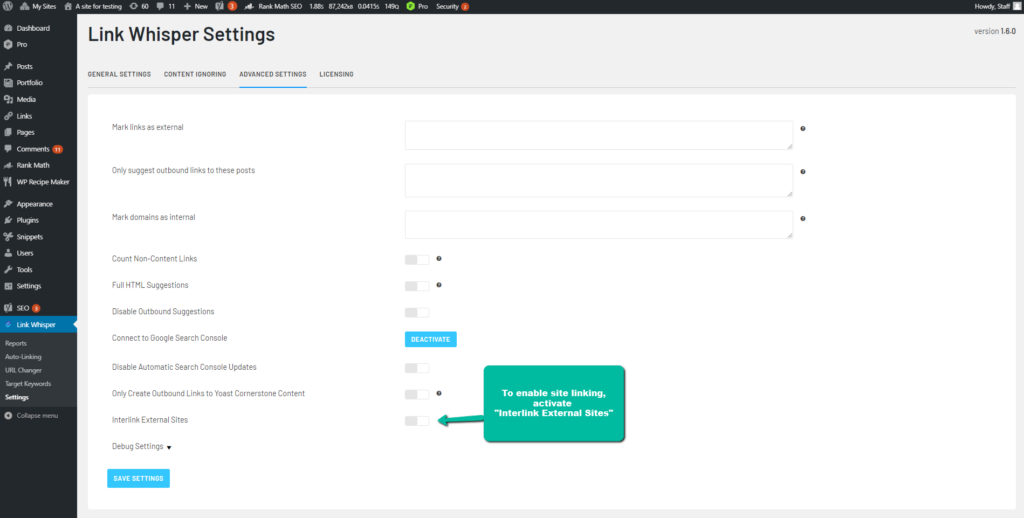
To begin the connecting process, we’ll go to the first site and configure it for connecting. The first step is to activate the “Interlink External Sites” option.
Next we’ll create the access code that will be shared between the connected sites. This code is used for identifying connected sites in the same “network” and for securing the connection. Link Whisper provides a button for generating a random access code for using in all the connected sites. The code must match between the connected sites, otherwise the sites won’t be able to connect to each other. Be sure to copy the code generated in the first site and enter it in the Access Code inputs in all the sites you want to connect.

After clicking the Generate Code button, copy the code and enter it in the Access Code field.

After creating the access code and entering it in the Access Code field, save the settings so the access code is stored in the Link Whisper systems.

Once the settings are saved, we can register the site that we want to connect to. Registering a site is the first step in making contact between the sites. It’s the way that we tell Link Whisper what sites will be in the network.
To register a site, we have to copy the home url of the site as it appears in the browser address bar and paste it into the setting row.


When we click the Register Site button, we’ll see a popup asking to confirm that the Access Codes match between the sites. Since this is the first site in the network, just click the “They Match” button and Link Whisper will register the site.


Now that the second site is registered with the first one, we’ll go over to the second site to register the first site there and complete the connection. For the time being, just ignore the “Attempt Site Linking” button, since this site isn’t registered with the second site, clicking the button will just result in an error.
Before going to the second site, copy the access code from this site, (the first one), so it can be entered in the Access Code field of the second site.

After entering the code and saving the settings, enter the home url from the first site in the site row and click the Register Site button.

We’ll be asked to confirm that the access code on this site and the first site match. Since we copied the code from the first site and entered it here, they do match and we can click the “They Match” button.

After confirming that the Access Codes match, Link Whisper will register the first site with this site.

Since both sites are registered with each other, we can now click the “Attempt Site Linking” button! This is the step where Link Whisper confirms that both sites recognize each other and that a connection can be made.

Once the sites are linked, we can import the data we’ll need for making the cross-site suggestions. To do this, just click on the “Import Post Data” button. It may take a few moments to import the site’s data, but you should only have to do this once since Link Whisper keeps track of content changes on the linked sites and micro-updates the imported data to keep it up to date.
However, if you feel that the site data might be out of date, you can redownload the post data anytime you like by coming back to this section and clicking on the “Refresh Post Data” button that replaces the import button.
You will have to import the post data for all sites that you want to make suggestions for. So if you want to make suggestions on the first site that link to the second, you’ll have to go to the first site and import the second site’s data.

Making cross-site links
Now that we have the post data imported, we can make some cross site suggestions! To do this, we’ll go to a post’s edit screen just as we would normally when adding outbound suggestions.
Once we’re on a post that has some suggestions and the suggestions have finished loading, we’ll see that the Link Whisper Suggested Links panel has changed. It’s now divided into two sections. The top section is for making links to posts on the current site, and the bottom section is for making suggestions to the external sites that we’ve connected to.
A further change is that the “Insert Links Into Post” buttons are now section specific. So clicking on the top button will only add links from the top section, and clicking on the bottom button will only insert links from the bottom section.

To make it easier to tell where the suggested links go to, we’ve changed the blue link in the suggestion a little. The links in the top section use the “relative” link format to indicate that they’re specific to the current site. The links in the bottom section have to full url printed out so you can easily tell what site the link is pointing to.

The process of adding external site links is just as easy as adding internal site links. The only thing to keep in mind is that the “Insert Links Into Post” button is section specific. So if you select a bunch of links from the top and bottom sections and click on the top “Insert Links Into Post” button, only links from the top section will be inserted.

After clicking the “Insert Links Into Post” button for the external site links, Link Whisper will add the selected links to the post content, and we can move on to another post!

If you have any trouble getting the sites to link, or you don’t get any suggestions, please feel free to open a support ticket with Link Whisper support. We want this to work for you and letting us know there’s a problem helps us make a better product.