Contents
- 1 What is an SEO Migration?
- 2 Other Types of Website Migrations
- 3 How Can a Website Migration Affect SEO?
- 4 SEO Migration Checklist: 29 Steps to Migrate Your Site Smoothly
- 4.1 1. Understand the scope and need of a website migration
- 4.2 2. Plan the move
- 4.3 3. Perform a site audit before the move
- 4.4 4. Benchmark your current analytics
- 4.5 5. Make a copy of your site
- 4.6 6. Protect the new site from users and search engines
- 4.7 7. Create a spreadsheet of all your site’s URLs
- 4.8 8. Implement a 301 redirect map
- 4.9 9. Decide where to redirect unnecessary URLs
- 4.10 10. Create a custom 404 page
- 4.11 11. Update, review, and self-canonicalize all internal links
- 4.12 12. Resolve duplicate content issues
- 4.13 13. Add Google Analytics to the new site
- 4.14 14. Add Google Search Console to the new site
- 4.15 15. Backup both versions of your site before the switch
- 4.16 16. Remove noindex and password protection restrictions
- 4.17 17. Make the move: Activate redirections and update DNS settings
- 4.18 18. Test redirects
- 4.19 19. Update sitemaps in GSC
- 4.20 20. Request a domain change in GSC
- 4.21 21. Update Google Business Profile, Bing Places, and Apple Maps
- 4.22 22. Run a site audit on the new site
- 4.23 23. Keep the old domain live
- 4.24 24. Try to get prominent backlinks updated
- 4.25 25. Run a mobile-friendly test
- 4.26 26. Check the performance of the new site
- 4.27 27. Keep track of indexing in Google Search Console
- 4.28 28. Monitor traffic and rankings
- 4.29 29. Troubleshoot and resolve emerging issues
- 5 Conclusion
Planning a rebrand or domain name change and need an SEO migration checklist to follow?
We have you covered.
In this post, we’ve compiled a detailed list of steps you can take for a seamless website migration.
Following this process with care will ensure your SEO rankings and traffic remain intact, so that your new site can thrive.
Let’s get started.
What is an SEO Migration?
An SEO migration is the process of making a significant change to your website that could have an impact on your SEO performance.
The most common form of migration that affects SEO is moving your website from an old domain name to a new one.
Other migrations that can positively or negatively affect SEO performance include changing the site structure, moving to a different CMS, or a site redesign.
The process involves many steps to ensure a smooth transition. Following this SEO migration checklist will help mitigate the likelihood of running into issues, such as losing search engine rankings.
Other Types of Website Migrations
Here are several types of website migrations that site owners and webmasters may encounter.
- Changing to HTTPS protocol from HTTP (http://example.com to https://example.com)
- Top-level domain (https://example.co.uk to https://example.com)
- Changing subdomain (https://www.example.com to https://example.com)
- A website redesign (changing branding, colors, logos, images, layout, copy, etc)
- Changing content management systems (from Wix.com to WordPress.org)
- Website structure (restructuring internal links, changing site navigation, etc)
It’s important to note that many of these site migrations can result in better performance if carried out carefully.
How Can a Website Migration Affect SEO?
The most common way website migrations affect SEO is when URL redirections haven’t been established correctly.
This can happen for many reasons and can result in significant SEO issues as a result.
Here are some of the consequences that may occur when SEO migrations go wrong:
- Loss in search rankings: If 301 redirects haven’t been set up and tested correctly, search engine bots may become blocked from crawling new URLs. If this happens, old URLs will lose their positions and the new site won’t get indexed.
- Drop in organic traffic: If the previous issue occurs, then you can expect a significant dip in organic traffic, as rankings disappear from the SERPs, so will visibility.
- Loss of backlinks: When 301 redirects are set up correctly, link equity remains intact. So, if there are redirection issues, this process can break valuable backlinks.
- Loss of trust: If users are landing on the wrong site or error pages, it can damage the trust and credibility you’ve developed in the past. This can lead to people avoiding your site.
- Loss of Revenue: Overall, a loss in traffic, search rankings, and trust will result in a loss of business earnings.
As you can see, website migrations shouldn’t be taken lightly. That’s why it’s essential to follow a detailed SEO migration checklist.
SEO Migration Checklist: 29 Steps to Migrate Your Site Smoothly
Follow this SEO migration checklist to plan, implement, and monitor your website migration successfully.
1. Understand the scope and need of a website migration
Before diving head first into a site migration, it’s important to understand the scope of the process. Furthermore, you may want to consider whether a site migration is indeed necessary.
Reading through this SEO migration checklist will provide you with enough insight to know what’s involved.
However, no matter how well a site migration goes, webmasters still see a fluctuation in organic traffic.
This is just the nature of search engines as it can take some time before website changes have evened out.
Therefore, if your only reason for migrating a site is for SEO gain, it may not be the best decision.
If you’re rebranding your site, switching to HTTPS, or believe a new domain will attract more backlinks, then a site migration could be a good move.
2. Plan the move
Planning is a crucial first step in any effective SEO migration checklist.
You’ll need to assign the right people for the task, set specific goals, and define a timeline for completion.
The whole process needs to be mapped out for your specific requirements and needs. The more planning you do in the beginning, the higher the chance you will avoid a negative impact on SEO performance.
Additionally, it’s important to keep a close look at your traffic after the move, making quick adjustments to any issues that may arise.
3. Perform a site audit before the move
Running a site audit on your old site is a necessary step for several reasons.
First, it will help you identify any technical issues that can be addressed on the new site before it goes live.
These issues can include things like crawl errors and 404s, redirect chains, and broken links.
Second, you’ll get a list of all the URLs that make up your site, which you’ll need later to map out 301 redirects.
Thirdly, you’ll be able to identify your most valuable pages that have the most backlinks. You’ll need to pay extra attention to these pages after the migration.
Lastly, a site audit can help you rework your internal link strategy, clean up orphaned content, and develop stronger topical relevance on the new site.
4. Benchmark your current analytics
Taking inventory of your current site’s analytics is essential to compare things after the move.
You’ll need to take note of current performance indicators such as traffic, domain authority, page load times, current rankings, and organic search impressions.

Collecting this data will enable you to see a side-by-side comparison once the migration has taken place.
Any discrepancies will be easier to spot so that you can take further action to remedy them.
Remember, the more time you spend planning in this stage, the smoother your site migration will be.
So, don’t just collect an overview of your site’s performance, detail everything to the page level.
This could include the following:
- Google Analytics overall traffic, average time on site, events per session.
- Page level traffic, time on page, bounce rate, internal link clicks.
- Keyword rankings in GSC, impressions, clicks, CTR, and average positions.
5. Make a copy of your site
The next step is to make a copy of your site that you’ll use to make changes. This should be hosted on a different server and a staging environment.
If your migration includes changing to a new domain name, then you can set this up on the new domain.
Just make sure you protect this version of the site from search engines until just before the new site goes live. More on this in a bit.
When copying your site, you’ll need to move all HTML, CSS, and Javascript files, images, and plugins.
Furthermore, you’ll need to copy the database and make the necessary configurations to work with the new URL.
Once this step is complete, you’ll be able to make a side-by-side comparison between the old version and the new one.
6. Protect the new site from users and search engines
After you’ve duplicated your current site, the new version will need to be hidden from search engines, so that pages don’t start getting indexed.

After all, we don’t want Google to think it’s a different site, but a new version of the same one.
Implementing this can be done in WordPress from the Reading setting or by adding a custom robots.txt with a noindex rule.
You may also want to password-protect this staging environment so that the only people who can access it are those with a password.
Again, this can be set up with a custom rule inside the .htaccess file on the server.
7. Create a spreadsheet of all your site’s URLs
Now you need to compile a comprehensive list of every URL on your current site.
You can gather a list of all your pages using tools like Google Search Console or Screaming Frog.
Export the list and arrange the pages with the most important at the top. This will help you test important pages after the migration to make sure any redirections are working correctly.
In this stage, it’s important to keep the URL structure the same as the original site. Otherwise, it can interfere with the migration process. Changing the architecture of URLs at this point can interfere with the migration process.
8. Implement a 301 redirect map
Next up is a crucial step where you need to map each URL from your current site to the new site.
If you’re changing the domain name, it’s important to keep as many URLs intact as possible, as this will increase the chances of a smooth transition.
However, if it’s a site revamp and your domain isn’t changing, it won’t have as much of an impact.
Either way, 301 redirects are essential for maintaining SEO rankings, so knowing exactly which URLs are going where before the move is a must.
This step can be carried out in the spreadsheet from the previous step. Just add another column next to the current URLs list and assign its counterpart next to it.
9. Decide where to redirect unnecessary URLs
From the list of links you’ve compiled, you’ll need to identify any URLs that no longer serve a purpose.
These URLs can be redirected to more relevant pages so there are no dead ends when users or search engines visit them.
To clarify, some types of migrations aim to improve the flow of link equity by changing things like site design and structure.
However, when migrating to a brand new domain, it’s important to retain the same URLs as best as possible, for at least 6 months after the domain change.
This will give search engines a better chance of transitioning to the new domain.
After this period, unnecessary URLs can either be merged into better ones or deleted.
10. Create a custom 404 page
Even following an SEO migration checklist to the letter will likely result in some 404-page errors.

Creating a custom 404 page could be a great opportunity to help users and search engines find the pages they were looking for.
The best 404 pages explain that the page they were looking for wasn’t found and provide users with other options to prevent them from bouncing.
You could also include links to your most important pages on the 404 page. This can help search engines find these pages and index them, instead of ending up nowhere.
You’ll then be able to monitor 404 errors after the site migration to make it easier to fix broken links or pages that are missing.
11. Update, review, and self-canonicalize all internal links
If you’ve copied over content from the original database, then you might need to review and update internal links so they match the new domain.
This will allow you to check and fix any broken internal links while you’re at it.
Any URLs you come across that reflect the old domain will need to be switched to the new one.
Even though these links will get redirected, it is a better practice to minimize redirections as much as possible.
You can change internal links using the change domain feature in Link Whisper or by using search and replace in your database.
Lastly, make sure to self-canonicalizing all the pages of your new site, instead of them pointing back to the old one.
This can be done with a plugin that adds the rel=”canonical” tag.
12. Resolve duplicate content issues
Duplicate content issues are common during an SEO site migration and these should be resolved before launching the new site.

If the new site has duplicate content, this will only confuse search engines and negatively impact SEO, so it’s best to remove them.
Additionally, canonical tags can help with duplicate content issues, as it tells Google which version of the page is the right one.
Another method is to use redirections where similar content can be redirected to the main page. This will also help consolidate link equity to a single URL.
Lastly, you’ll need to make sure internal links point to the correct version of the intended page, updating any links pointing to IP addresses or non-HTTPS URLs.
13. Add Google Analytics to the new site
Install the Google Analytics code to your site at least a few days before the migration date.
This will ensure Google is collecting traffic data as soon as the new site goes live.
You may also want to set filters to prevent GA from tracking internal traffic from your team.
14. Add Google Search Console to the new site
It’s also important to add Google Search Console at this stage to minimize gaps in reporting. Doing this before the move will ensure you’re able to monitor your coverage as soon as the migration takes place.
You can verify your domain by adding a DNS record to your domain name provider.
In addition to verifying our domain, you can see if Googlebot can access the new site. You can verify this from the “Crawled – currently not indexed” screen in GSC.
15. Backup both versions of your site before the switch
You’re getting close to switching to the new version of the site. Therefore, one of the last steps is to make backups of both versions.
This will ensure you have a copy of each site if anything goes wrong.
Make these backups easily available so that you can revert quickly if you need to.
16. Remove noindex and password protection restrictions
The very last step before the migration takes place is to remove any restrictions added to block search engines and users.

This includes removing the Noindex rule in the robots.txt file and password protection if you added it.
To verify your site is accessible, you can use SEMrush’s Crawlability report or inspect a URL using Google Search Console.
17. Make the move: Activate redirections and update DNS settings
It’s the moment of truth. Everything you’ve done up to this point should have been meticulously double-checked.
When you know everything looks right, you can activate your 301 redirections.
If you’re changing to a new domain name, the simplest way to do this is by adding a regex rule to the .htaccess file.
It should look something like this:
<IfModule mod_rewrite.c>
RewriteEngine On
RewriteCond %{HTTP_HOST} ^oldsite.com$ [OR]
RewriteCond %{HTTP_HOST} ^www.oldsite.com$
RewriteRule (.*)$ http://www.newsite.com/$1 [R=301,L]
</IfModule>
If your migration is just a revamp and you’ve developed this on a different server, you can now update your DNS records to point to this one.
To speed up the DNS process, choose the lowest TTL possible. This will speed up the propagation process.
18. Test redirects
The first thing to do after you’ve initiated the migration is to test that redirects are working.
You can test this in multiple browsers and by using tools like httpstatus.io.
Go through your redirections spreadsheet and test the most important pages are immediately redirecting to the corresponding pages.
19. Update sitemaps in GSC
Now you need to submit your XML sitemap for your new domain name in Google Search Console.

This will help Google see that the old URLs are now hosted on a new domain name.
It is also recommended to keep a copy of your old sitemap active in GSC for six months. This can help Google pick up on redirections faster.
20. Request a domain change in GSC
Now that your new site is live and redirecting from an old domain name, you need to update this move in Google Search Console.
You might want to read through the Change of Address Tool documentation before using the tool itself, just to make sure you haven’t missed anything.
The tool works by first selecting the original property in GSC, then selecting the new property on the next page:

This will instruct Google to treat the new domain name as the old one and retain its ranking positions and link equity.
21. Update Google Business Profile, Bing Places, and Apple Maps
The next step in the SEO migration checklist is to update your URL in online services like Google Business Profile, Bing, and Apple Maps.
You’ll also want to update the domain on your social media platforms, such as Pinterest, Facebook, and Twitter.
Even though these links will redirect to your new site, it’s still advisable to point directly to the new one, as this will speed up the transfer.
22. Run a site audit on the new site
Running another audit on your new site will reveal any new issues that may have occurred post-migration.
This audit will help identify crawlability issues, duplicate content, on-page SEO problems, broken links, missing metadata, and more.
There are lots of tools that can help you with this, such as Screaming Frog, Ahrefs, and SEMRush.
23. Keep the old domain live
For best results, you’ll need to keep your old domain name live for as long as possible so that redirects remain active. Six months is what’s recommended by Google.
This will keep redirections active long enough for Google to crawl every old URL and index its new location.
24. Try to get prominent backlinks updated
Even though 301 redirections transfer over link equity, a better option is for backlinks to point directly to the new site.
If you have experience with outreach, you can content the website owners who link to you, asking them to update the backlink.
You’ll want to let them know which of their pages link to your site, which page it links to, and the anchor text.
25. Run a mobile-friendly test
Did you know that Google index your site based on its mobile-friendly experience? This is called mobile-first indexing.

Therefore, it’s a good idea to check your site is fully mobile-responsive and that the migration hasn’t caused any issues.
To do this, you can use the Google Mobile-Friendly Test, which is a free Google SEO tool.
26. Check the performance of the new site
One of the last checks you’ll need to run is for site speed and performance.
Use Google Lighthouse or GTMetrix to get a detailed score of your site speed and what you can do to improve it.
Fixing any issues will help Googlebot crawl and index your new site faster.
27. Keep track of indexing in Google Search Console
Make it a daily habit to monitor your index status, URL coverage, and search rankings in Google Search Console.

Compare your list of important URLs to the ones found by Google. If some important pages are taking too long to show up, you can speed things up by using the URL inspector.
Tracking things in GSC regularly will help you gauge how well the indexing progress is going.
28. Monitor traffic and rankings
In addition to keeping your eye on organic performance, you’ll want to check your overall site traffic in Google Analytics.
If things are looking good, you should see a steady incline without any sudden drops in traffic.
Monitoring any fluctuations in traffic, user behavior, or time on site will allow you to troubleshoot any issues quickly.
At this stage, you will also benefit from checking keyword rankings in Google. You can use a tool like Rank Logic which not only tracks ranking positions but also monitors updates you make to the site.
29. Troubleshoot and resolve emerging issues
The last step in this SEO migration checklist is to simply keep a close eye on anything that may pose a threat to the migration process.
Use tools like Search Console, Google Analytics, Rank Logic, Bing Webmaster Tools, and Ahrefs as a personal arsenal against drops in traffic and rankings.
Any emerging issues that arise will need troubleshooting and resolving immediately to prevent long-term negative effects on your site’s SEO.
With a team onboard who knows the SEO migration process well and with good communication, your site migration will go smoothly.
With a knowledgeable team who knows the SEO migration process and communicates effectively, your site migration will proceed smoothly.
Conclusion
There you have it. The ultimate SEO migration checklist to help you plan, implement, and monitor a site migration with ease.
It’s true that no site migration is a straightforward task. But with careful planning and a complete checklist to follow, you can your team can carry it out with zero complications.
Now, if you want to start boosting your rankings even further, nows the time to implement an solid internal link strategy. You may also want to clean up any on-page SEO problems since migrating your site.
Good Luck.
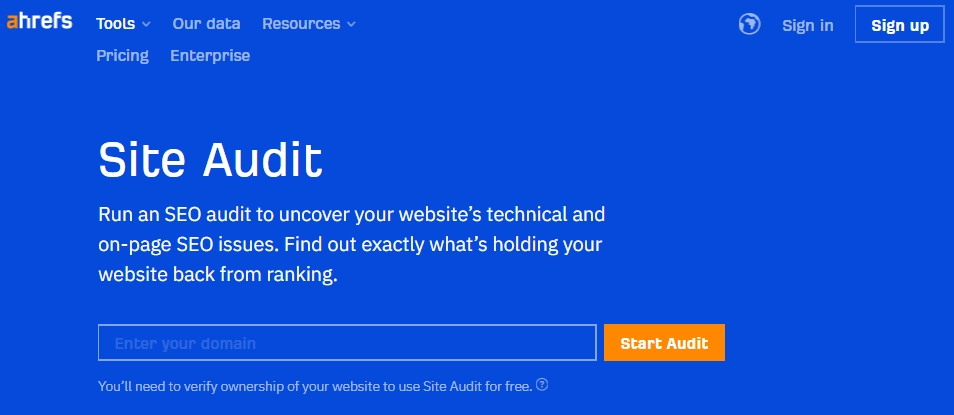
Check if your site has the same issues.
Run a free audit right now. See your orphaned pages, broken links, and link health score in 60 seconds.
Check My Site