To get your OpenAI API key & and unlock the AI powered features of Link Whisper, you will need an API key. The key allows Link Whisper to ask OpenAI to process your site’s data, and is essential for linking the data requests with your account.
Getting Started.
The first step is to go to the Developers Platform on OpenAI.com, and log in.
If you already have an account, please log in. If you don’t have an account yet, please create one. (It’s really quick, and free to setup)

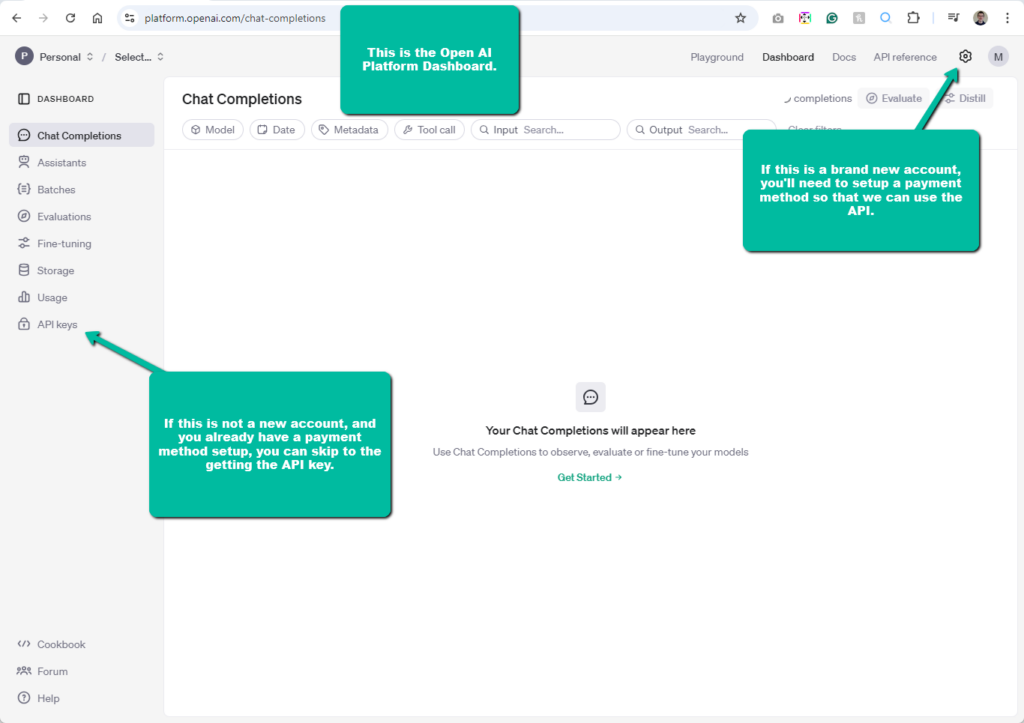
Once you’re logged in, we’ll need to go to the Dashboard page. Please click on the Dashboard link at the top of the screen.

Setting up a Payment Method.
If this is a new account, we’ll need to setup a payment method so that OpenAI can make charges & allow us to use the API. If this is not a new account, and you already have a payment method set, please skip to “Generating the API Key” section
Inside the Billing screen, please click the “Add payment details” button.

When you do this, OpenAI will ask you if you’re adding this on your own behalf as an individual, or if you’re adding this for a company. For the sake of this tutorial, I’m going to choose “Individual.”

After specifying who’s going to be paying for this, OpenAI will present us with a standard credit card payment form, which we’ll need to fill out.

Setting up Initial Payment.
Once that’s done, OpenAI will ask us to configure the payment settings. OpenAI works on a prepaid-use basis, so we need to put some money on the account. For this tutorial, I’m going to start with $10, but you should choose an amount that you are comfortable with spending. A good starting amount is usually between $10 and $25.
After that, we need to decide if we want OpenAI to be able to automatically charge the account after the initial payment is used up. If we do, we need to set an account threshold for when it will charge the credit card. For example, setting it for $5 will tell OpenAI that it’s okay to charge us when the account balance drops below $5.
Then, we need to set the amount that they can charge the card. Like the starting payment, it’s usually a good idea to set this somewhere between $10 and $25. So if the billing threshold is $5, it should charge somewhere between $5 and $20 to recharge the account.
Once we’re satisfied with our settings, we should click “Continue” to proceed with the payment.

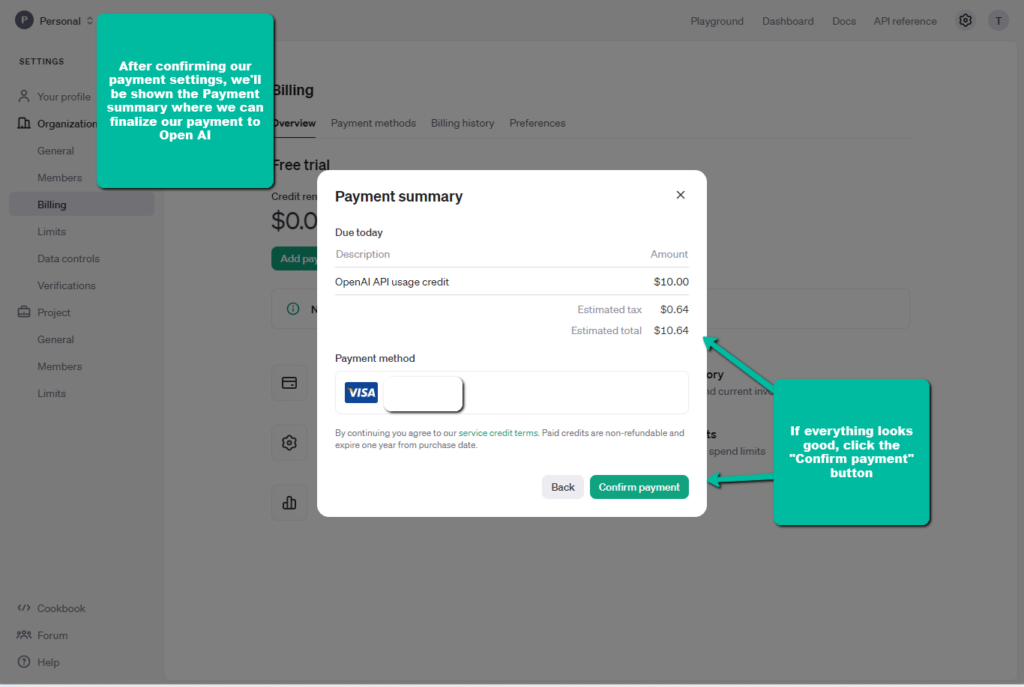
After confirming our payment settings, we’ll be shown the “Payment summary” where we can finalize our payment to OpenAI. If everything looks good, click the “Confirm payment” button.
Setting up API Key.
Once the charge is accepted, we’ll be ready to setup the API key! To go to the API key section, please click on “Dashboard” in the left sidebar.

From the Dashboard, please click on the “API keys” link in the sidebar to the left.

Account Verification.
If this is a new account, you’ll need to verify your phone number before a key can be created. If the account has already been verified, please skip to the “Generating the API Key” section.

Verification is done by texting a code to your phone, so we’ll need to enter the number here & go through the verification process. Once you’ve done so, you can click on the “Create new secret key” link in the middle of the screen.

Generating the API Key.
When setting up the key, we’ll need to tell OpenAI what the API key is going to be used for. By default, the key is owned by “You”, and is tied to your user account. Since this is a personal API key, we’ll leave it set to “You.”
We can give the API key a name so that we can identify it later. The name doesn’t need to be kept secret, and it’s not used for anything other than telling us what the API key does, so it’s a good idea to name it something like “My Link Whisper API key.
Next is setting the Project that the key is associated with and the permissions that it has. If this is a new account, there will only be the “Default” project, but if this is an existing account, you can choose a different project if you desire.
Finally, for Permissions, we want to choose “All” since Link Whisper needs access to multiple different AI resources. Once everything is set, click on the “Create secret key” button to create the API key.

Once you click the “Create secret key” button, there will be a short wait while OpenAI generates the new key for you. When it’s finished generating the key, you’ll be shown the fresh new key so you can use it.
This is the only time that OpenAI will show you the key. Please copy the key to a secure location so you can access it if you need to in the future.
With the key safely copied and stored for later, we need to go back to the Link Whisper Settings page so it can be entered.

Entering the API Key in Link Whisper.
Inside the Link Whisper Settings page, please paste the API key into the “OpenAI API Key” field. After pasting in the key, please click on “Save Settings” button to save the key.

Once the page reloads, Link Whisper will do a quick check with OpenAI to make sure that the key is valid. If it is, all of the AI features will unlock and you can begin processing your site’s content!
