Contents
WordPress is known for being one of the most SEO-friendly content management systems around. And while that’s true, there are still a few things you will need to do yourself after you install WordPress and going forward as you create content for your site.
This article will cover the basics of WordPress SEO, including some essential tips and the best plugins to help you get started. After reading and implementing the steps on this list of on-page SEO factors, you should have a solid understanding of how to optimize your WordPress site for better search engine visibility.
What is WordPress SEO?
WordPress SEO refers to on-page SEO for WordPress websites or blogs. It involves optimizing all areas of a WordPress site to ensure it ranks well on search engines like Google.
WordPress SEO involves a variety of things, including:
- Good site architecture
- Organizing your URL structures
- Setting up the correct page titles and meta descriptions.
- Creating an XML sitemap
- Internal linking
- Making sure your site is fast and secure
It can also involve optimizing your written content and other page elements, such as images.
Using these best practices and avoiding on-page SEO problems will help visitors find what they are looking for. It will also help search engines crawl your site and connect the dots between your content.
Why WordPress SEO is Important
Having a well-optimized WordPress website means that search engines can easily crawl, index, and rank the pages on your site, showing the most relevant pages to people searching for matching queries on search engines like Google.
When done properly, WordPress SEO can help to increase organic search traffic to your website or blog by making sure content is visible to target audiences through search engine algorithms.
Unlike paid traffic, you can reap the rewards of SEO for years to come, so it’s well worth taking the time to get it right.
To put it bluntly: On-site SEO is essential to the success of any blog or online business. If you don’t optimize your site, you are essentially shouting into a void—you will be wasting time creating content that no one will see.
WordPress SEO Basics
So, without further ado, we’re going to get into the basics of WordPress SEO. As soon as you’ve got WordPress installed, you should begin working your way through this list.
Setting up Google Search Console
Google Search Console is a completely free tool provided by Google that is invaluable to website owners.
It offers a range of features to monitor and improve the visibility of your websites in search engines, from obtaining important information about website performance and submitting sitemaps to evaluating links. It will even send you alerts when crawling issues arise, so you can fix them ASAP.
By tracking metrics such as traffic, clicks, impressions, users, and queries, Google Search Console helps users understand exactly how their content is performing on Google’s search engine.
The good news is, setting up Google Search Console is easy, and it takes only a few minutes.
First, visit the Google Search Console page, where you will be asked to log in with your Google account. Once you’re logged in, you will be taken to the setup page.
Here, choose the ‘Add Property’ option and enter your website’s domain or URL prefix.
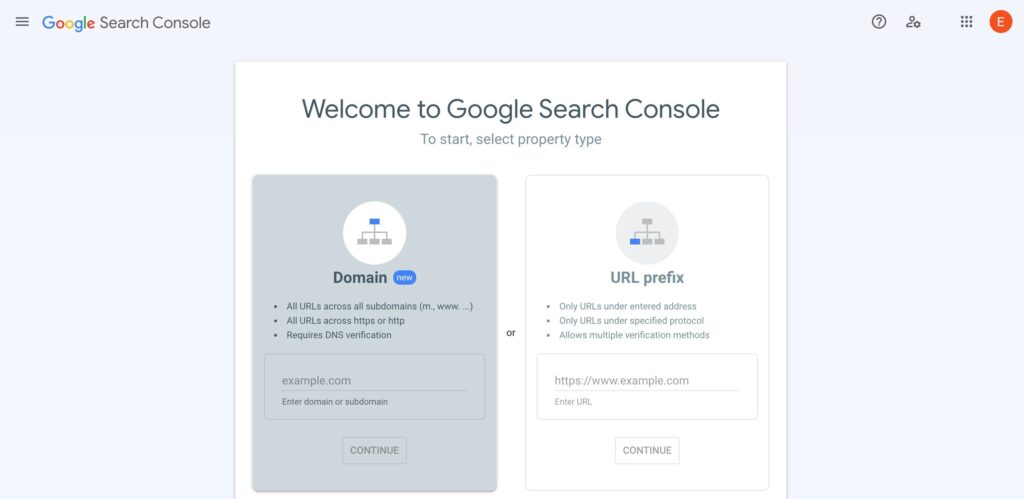
In most cases, you will want to select the ‘Domain’ property type (for example, yoursite.com). This is because a domain property includes all of the prefixes and subdomains associated with your domain.
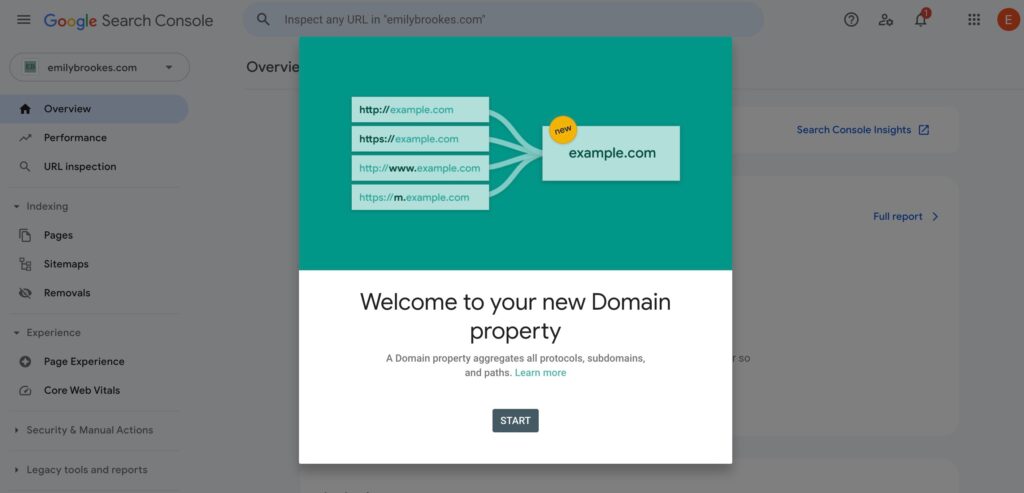
If you have selected Domain as your property type, and your Google account is already associated with the domain, it should verify this automatically for you. Otherwise, you will need to verify this with your DNS provider (domain name provider).
If you have used a URL prefix, you can verify your ownership of the website by choosing from one of four methods:
- HTML File Upload
- Domain name provider
- HTML tag
- Google Analytics tracking
Complete the verification requirements, then submit your request. And that’s it! You are now ready to use Google Search Console to monitor your website performance and make improvements as needed.
WordPress Site Visibility Settings
One of the first things you should check once your site is live is the site’s visibility settings.
By default, WordPress sites are visible to search engines. However, either you or your developer may have turned this off when your site was in development, so it’s important to check that your site is now visible.
To check this, log in to your WordPress admin area, click on ‘Settings’, and then ‘Reading’ in your toolbar.
Settings >> Reading
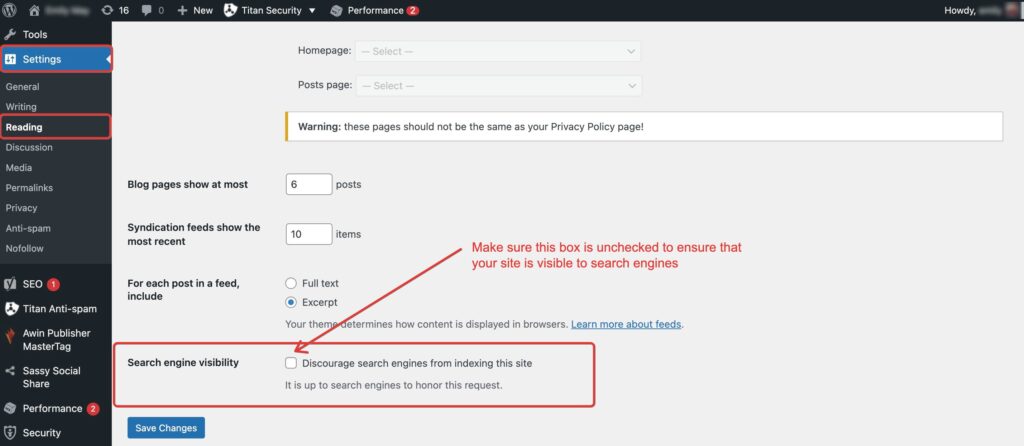
If the box has been checked in error, simply uncheck it and hit ‘save changes’. If it’s unchecked, you don’t need to do anything.
URL Structure
Maintaining a logical URL structure in WordPress is essential for two reasons. Firstly, it’s important from an SEO perspective, as structure plays a role in how pages are indexed by search engines and how they appear in search engine rankings.
Secondly, an organized URL structure also makes it easier for your visitors to understand what a page is about by just looking at the link.
Here’s an example of a good URL structure:
https://linkwhisper.com/knowledge-base/link-whisper-starter-guide/
From this well-structured URL, we can tell that this is an article titled ‘Link Whisper Starter Guide’ in the Link Whisper knowledge base.
A poorly structured URL would look something like this:
https://linkwhisper.com/2022/12/archives/2097354
This type of URL structure doesn’t tell the user what the page/post is about, which in a similar way, doesn’t help search engines understand it either.
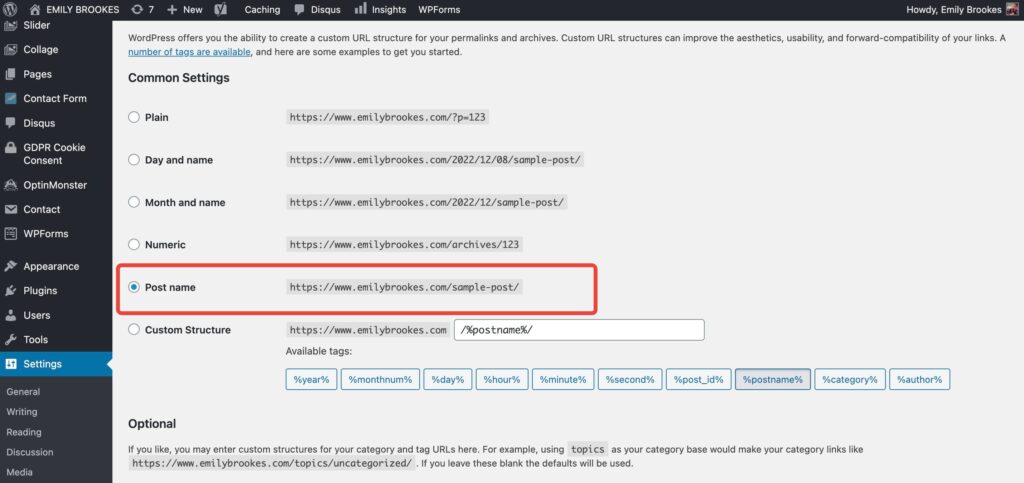
Thankfully, this is easy to change in WordPress. In your dashboard, head to:
Settings >> Permalinks
Here, you can choose your URL structure. The best option is ‘Post name’. It simply pulls the URL from the title of your blog post. This makes it really easy for users and search engines to understand what the page is about.
You will also have the option to edit this in your WordPress post or page editor before you publish each blog post. This means that if you have a very long title, you can shorten it to just the main keyword.
For example:
https://yoursite.com/puppy-training-for-beginners-everything-you-need-to-know/
You can shorten this in your WordPress editor to:
https://yoursite.com/puppy-training-for-beginners/
Note: Changing your site’s URL structure should ideally be done before you start posting content. If you already have an established blog, changing your permalinks settings will change all of the permalinks on your existing blog posts, which could have a negative impact on your SEO. If you want to do this on an existing site, it’s worth hiring a professional to set up redirects for each page.
Site Address Format
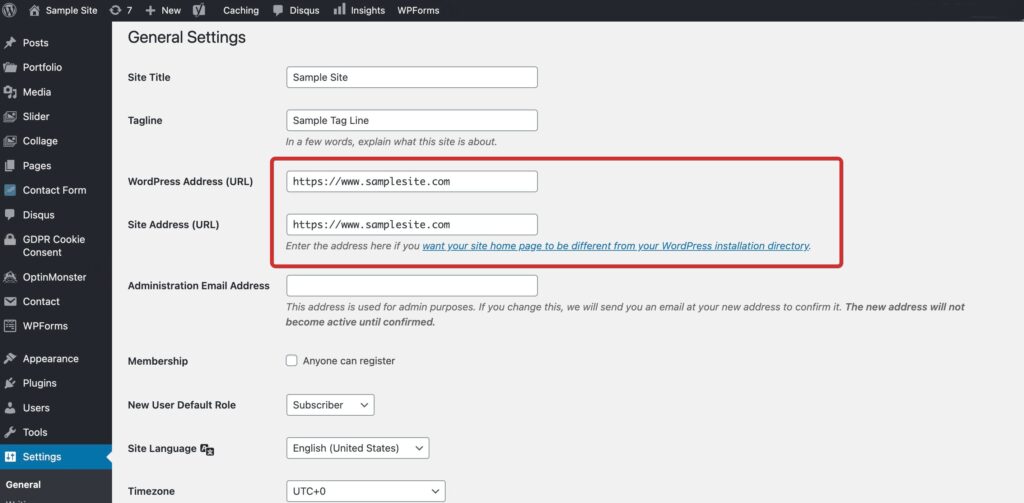
When you first set up WordPress, you will need to choose a site address format, which is your domain, either with or without the ‘www’ prefix.
Search engines read these as two separate websites, so it’s best to just choose one and stick with it. It doesn’t matter which you choose from an SEO perspective, though.
You can change this in Settings >> General Settings.
Site Architecture
Categorizing your content properly and connecting it logically in relation to other areas of content will help both search engines and users navigate your site easily.
You can plan this out beforehand to help you visualize your page hierarchy. Your home page should be at the top, with the main pages in your menu next.
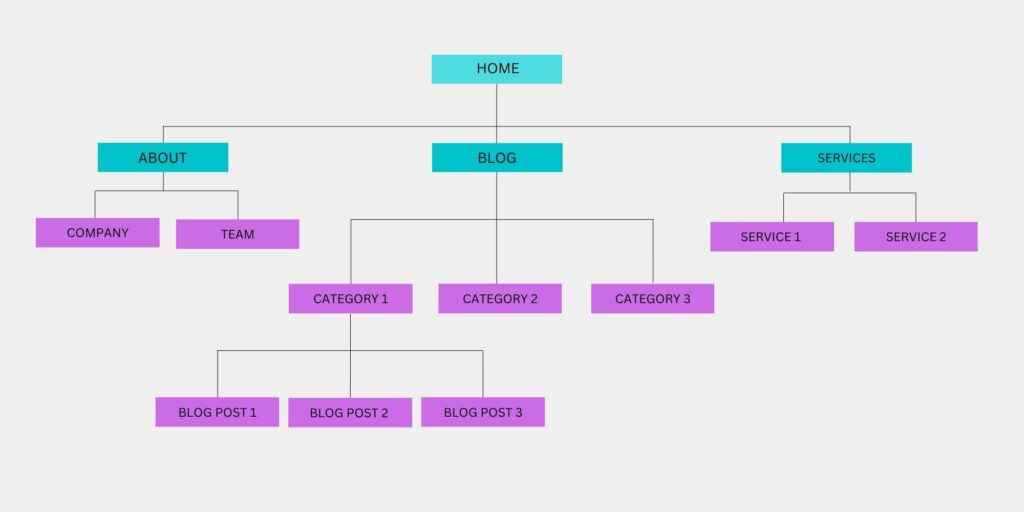
You may also want to split your blog content into categories if you cover a wide variety of topics. Again, this will help users easily navigate to information on the topic they are looking for.
Creating an Intuitive Menu
Your website’s menu is an essential part of the user experience. When a website’s navigation menu is easy to use and understand, visitors can move quickly and smoothly from one page to another, allowing them to access all of the site’s content.
Intuitive menus help increase user engagement, as visitors can find what they’re looking for without having to struggle to figure out how the pages are connected.
A well-thought-out menu also makes it easier for new users to explore and interact with a website. Rather than being overwhelmed by too many options, visitors can navigate around the site in seconds, leading them to what they are looking for straight away.
Most menus typically include links to the following pages:
- About Page
- Blog
- Services
- Contact Page
- Shop
And anything else that your visitors would want to find quickly. From these categories, you may want to link to other pages, such as a different page for each service you offer.
Blog Posts vs. Pages: What’s The Difference?
If you’re publishing content on a blog or website, it’s important to understand the differences between posts and pages. Blog posts are typically in reverse chronological order, so the most recent item is first. They also usually contain tags and categories to help readers find information.
Pages, on the other hand, are more static information about your site or blog. For example, an ‘About Me’ page or a page that highlights products or services you offer. A page does not change often and will typically stay in one place on your navigation menu.
Tags and Categories
Using tags and categories in WordPress can help you organize your blog both visually and logically. Tag words provide relevant labels to posts, while categories allow users to organize the posts into broader topics in order to make navigation easier.
If you categorize your posts, your readers will be able to quickly identify the type of content they’d like to explore.
Not only does this streamline content discovery for the reader, but it also makes it easier for search engines to crawl your site.
Every time you create a new post in WordPress, you will need to select a category. If you don’t, it will automatically be set as ‘uncategorized,’ which will look unprofessional from a reader’s perspective.
You can create new categories for your posts by heading to Posts >> Categories in your WordPress dashboard.
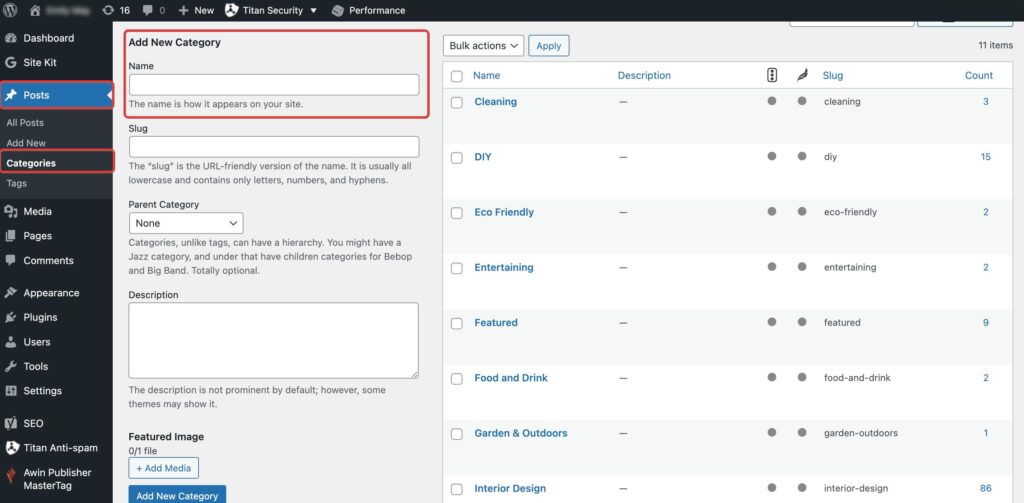
Simply type your new category title into the ‘Name’ area, add any relevant information required by your theme, and hit ‘Add New Category’ to save.
Next time you’re in your WordPress editor writing a new blog post, you will then be able to select the category you want that blog post to be in.
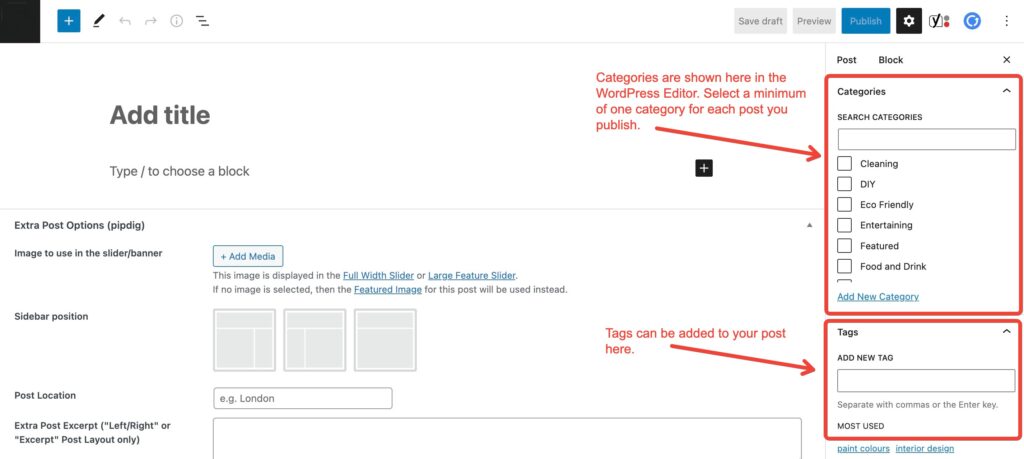
Unlike categories, Tags are not a requirement. However, you may want to add them to posts with certain characteristics to help group them. When visitors click on a tag, they will be taken to an archive page on your blog showing all of your content with the same tag.
For example, you could write a blog post in the category DIY and then add tags to describe more precisely what the content covers, such as Woodworking, Furniture, Eco-Friendly, Paint, and anything else that might be useful to your readers.
Note – It is best for SEO not to use more than one category and/ or one tag per article. Putting the same article in multiple categories or tags can hurt your website structure and topical authority.
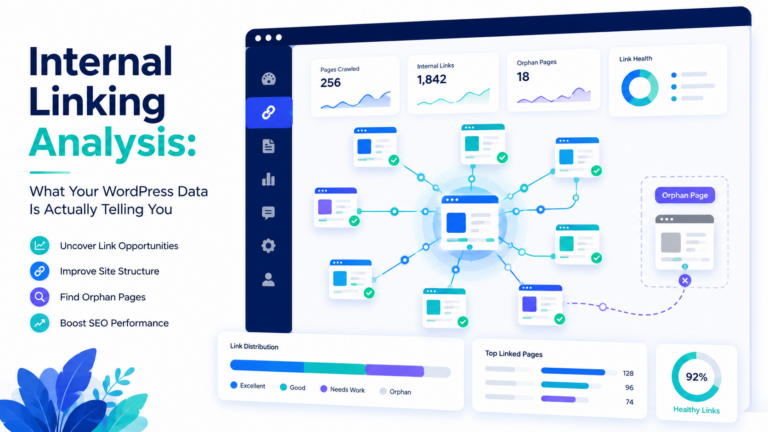
Internal Linking
Good internal linking is an essential part of any SEO strategy. It helps search engine crawlers understand the structure of a website by providing paths between different pages and posts. This can significantly improve a website’s ranking in search engine results pages, potentially driving more traffic to the site.
Internal links can also help draw visitors’ attention to other relevant content, allowing them to stay longer on the website and browse through more articles or blog posts that might be of interest. This can also help boost rankings and increase user engagement.
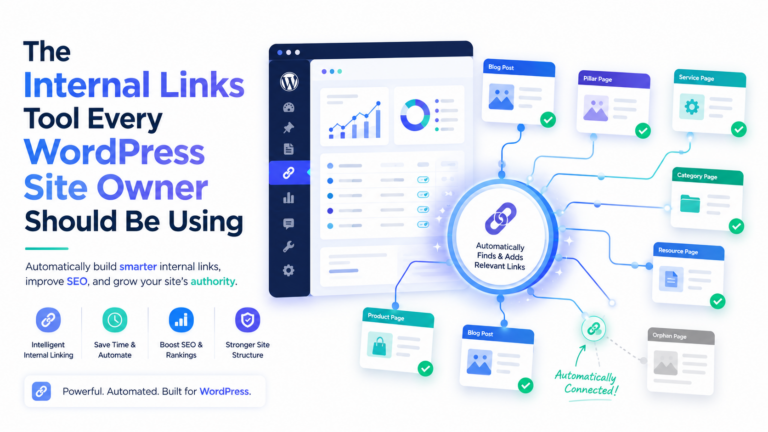
The easiest way to manage your internal links is by using Link Whisper. Link Whisper enables you to:
- Quickly add relevant internal links to your article within the WordPress editor
- Add new links to old content in seconds
- Find orphan pages (pages with no internal links pointing to them)
- View all of your link stats in one easy-to-read dashboard
- Easily see broken internal and external links
Read the Link Whisper Starter Guide for a complete walk-through of the features and how to get set up.
Check out this internal links case study on Niche Pursuits to see how internal linking increased traffic and rankings without any external link-building or content updates!
Site Speed
The speed of your website is a vital aspect to consider when it comes to SEO.
Slow-loading pages can significantly reduce user engagement and increase bounce rates. The probability of bounce increases to a shocking 32% as your page loading speed increases from 1 to 3 seconds.
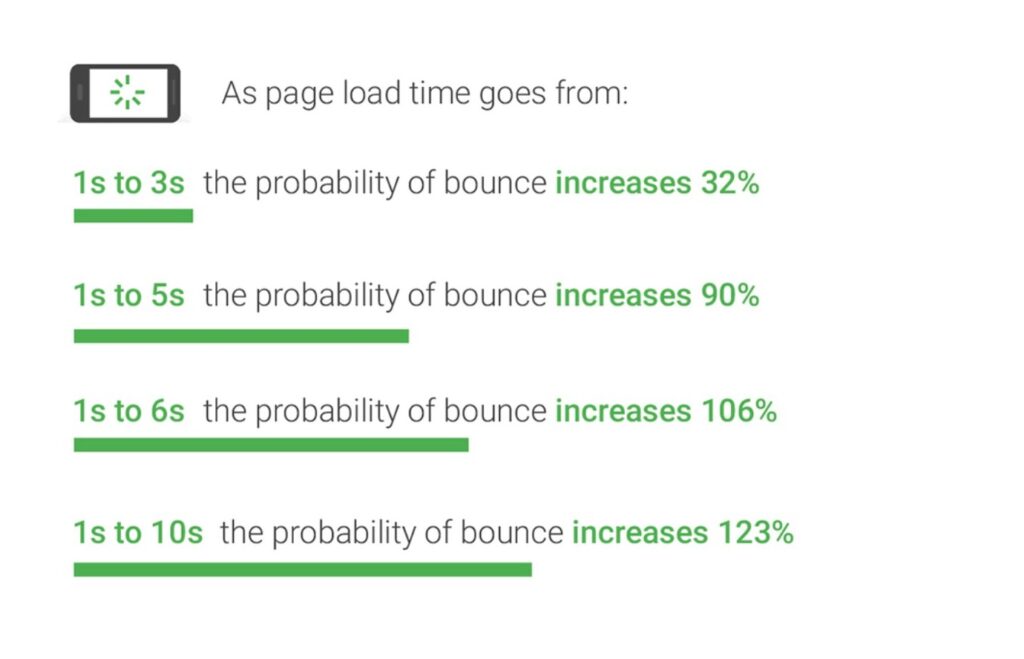
Google uses website speed metrics as one of its factors for ranking websites. So the faster your site loads and works, the higher it will rank on major search engines and the more engaging and enjoyable the user experience will be. Win-win.
Investing in fast hosting, removing unnecessary elements and plugins, compressing large images, caching, and using a CDN can increase site speed and improve SEO performance.
Choosing a lightweight theme
When optimizing your site for speed, your first port of call is choosing a fast, lightweight theme.
Many themes out there look great but are sluggish when it comes to speed.
Thankfully, there are a few good options to choose from that will help you create a lightning-fast website in no time.
Some of the fastest WordPress Themes include:
These themes are lightweight and super-fast, so you can rest assured that they won’t slow down your site.
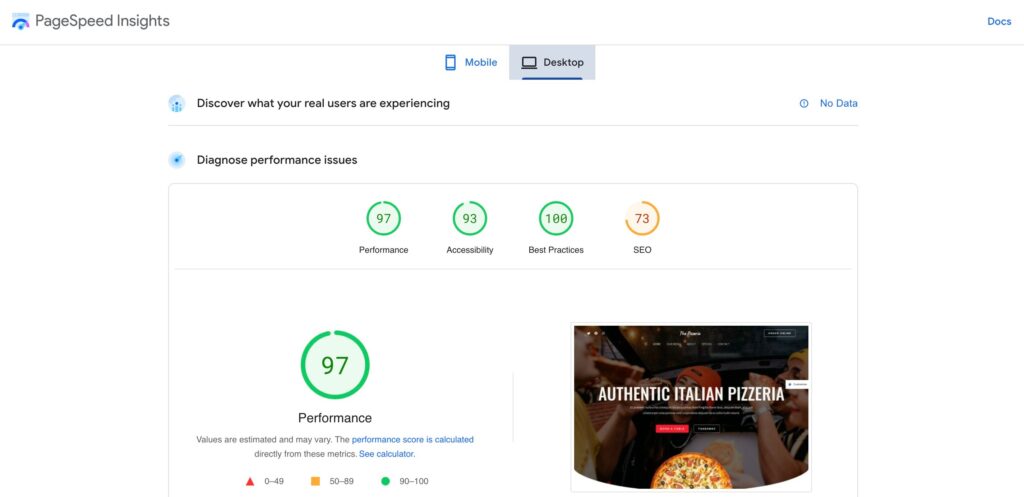
If there’s another theme you love, you can test its speed using Google Page Speed Insights. Simply paste the URL of the live theme demo you want to test to see how it measures up.
Optimizing Your Images
Optimizing your images helps with page-loading speeds and helps search engine crawlers identify your images and understand how to categorize them.
Many people overlook image optimization. However, optimizing your images is great for SEO and can help bring even more organic traffic to your site.
Follow these steps to make sure your images are fully optimized:
1 – Compress Your Images
Large images can take a long time to load, which can have an impact on your SEO. You can compress large images without compromising quality before uploading them to WordPress using a tool like TinyPNG.
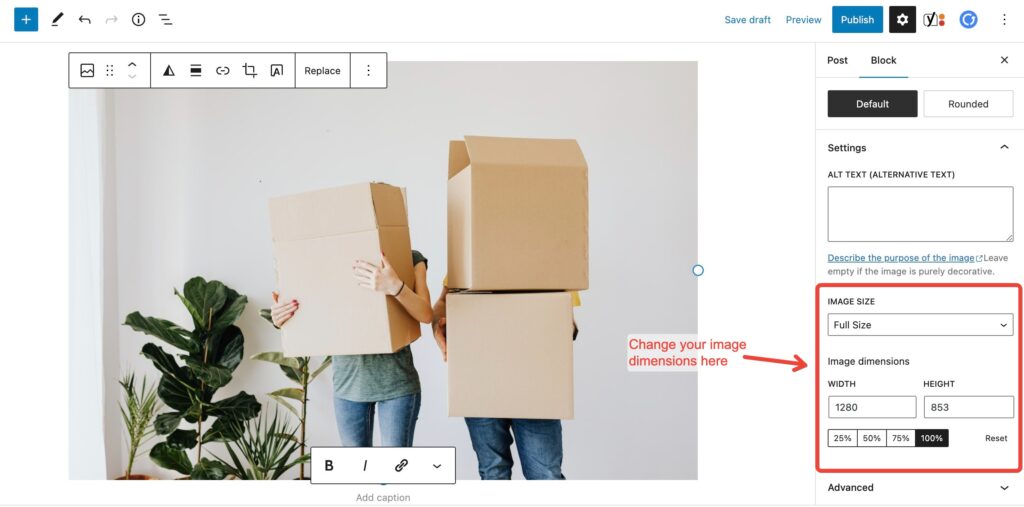
You can also resize large images using an editing tool like Adobe Photoshop or GIMP.
Save your image using a descriptive title rather than an image number before uploading them to WordPress.
You can also resize your images within the WordPress editor.
2 – Use Alt Tags
Image alt text, sometimes called alt tags, are HTML attributes that provide text-based descriptions for website images. They are often used to help visually impaired people understand and interact with images on the web.
Alt text can be read out loud by browsers and other web readers, providing a more comprehensive experience for those with physical disabilities.
Image alt attributes also support SEO if they contain keywords that are relevant to your content. This can help to increase website ranking in search results pages, as well as in image search pages.
3 – Add Captions
You might be surprised that people skimming through your content are more likely to read the image captions than the body text of most websites! If it‘s appropriate, add a caption to your image.
Content Optimization
You should create engaging content that your visitors will love, but that isn’t always enough to get you to the first page of Google.
Content optimization is a crucial part of WordPress SEO and should be taken into consideration for every post and page you create for your website.
Every page you want to drive traffic to should focus on a specific keyword or phrase.
For example, if you run a Dog website and want to write an article about dog training, your focus keyword might be ‘Dog Obedience Training’ or ‘How to Train a Puppy.’
You can download a plugin like Yoast SEO or Rank Math, which will give you a list of tasks to ensure that each post you write is optimized for your chosen keyword.
If you want to go further, you can use a content optimization tool to help you optimize your content and outrank your competitors.
Some good options include:
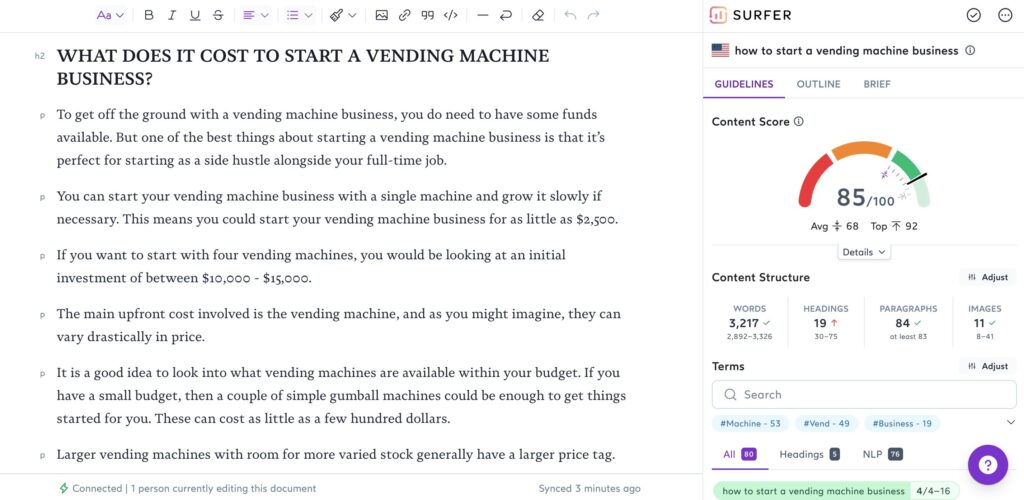
- Surfer
- MarketMuse
- Clearscope
These tools will measure your content against your competitors’ content in the SERPs and show you precisely what you need to do to outrank them. You will be provided with a readability score, target content length, and a list of keywords to include.
Targeting The Right Keywords
Targeting the right keywords is key to attracting organic traffic from your target audience.
It’s worth using a tool like Ahrefs or Semrush to do in-depth keyword research and consider what you want from your visitors.
Do you want them to buy a product from you?
Or visit a page so that you can make money from ads?
Once you understand your audience, you can tailor your keyword strategy around their needs. Aside from bringing you a steady stream of organic traffic, this will also help to boost your conversion rates.
If you’re brand new to blogging and have a low Domain Authority (DA), you will want to target low-competition high-volume keywords. As your site grows and you gain more authority, you can start targeting more difficult keywords.
This guide covers everything you need to know about keyword research for SEO.
Avoid Keyword Cannibalisation
Keyword cannibalization occurs when a website has two or more pieces of content that target the same keyword.
This can confuse search engine algorithms regarding what content should appear in their results, leading to lower rankings or no visibility. Any website that wants to invest in successful SEO must pay close attention to keyword cannibalization and take steps to ensure keywords are targeted on one page only whenever possible.
Security
A secure site protects your content and the hard work you put into creating your online business and builds trust with search engine crawlers and website visitors.
Search engine algorithms consider various signals when deciding how to rank sites in search results, one of which is site security. If your website isn’t secure, you risk being flagged by search engines as malicious or non-credible, resulting in a penalty that could significantly affect your SERP visibility.
Taking the necessary steps to secure your website will save you from these issues and help you attract more organic visitors by ranking higher in SERPs.
Choose a Secure Username and Password
After creating your WordPress account, you should change your username and password to something difficult for hackers to guess.
Your password manager can choose a secure password that combines letters, numbers, and special characters. Consider using LastPass or a similar alternative if your computer doesn’t have a built-in password manager.
SSL
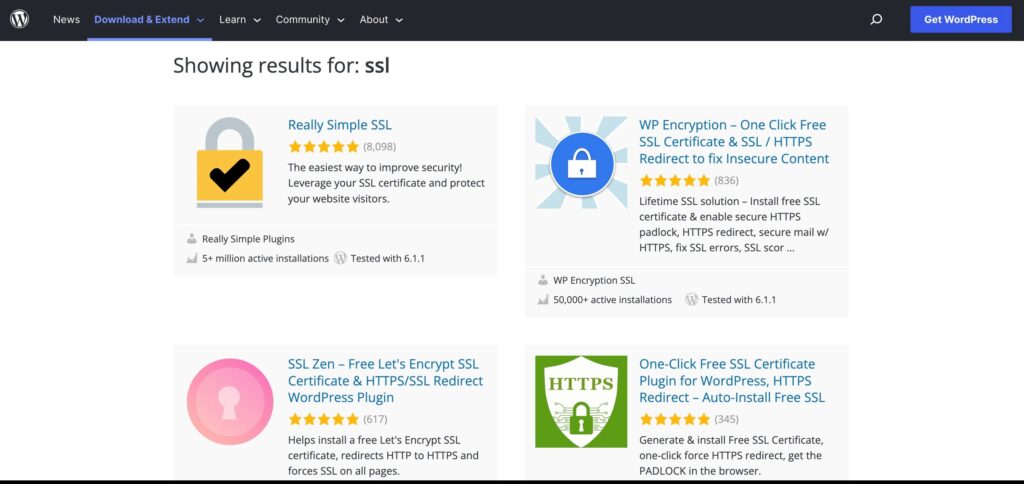
An SSL (Standard Sockets Layer) certificate is a must for any website or blog. It encrypts the data between a server and a browser so that hackers can’t intercept it, keeping your site and your visitor’s information safe.
Most good hosting providers will include this in your hosting package, but if you don’t already have it, you can install a free SSL plugin.
Another thing worth doing for your security is to take regular backups. Check if daily backups are included with your hosting plan; if not, set yourself a reminder to manually back up your site daily or weekly as required.
The Best WordPress SEO Plugins
One of the best things about WordPress is that you can add plugins to your site to help with your SEO.
Here are some essential WordPress SEO plugins to get you started.
- Yoast SEO – Helps you create SEO-friendly content and takes care of technical SEO issues
- W3 Total Cache – Reduces page load time and improves site performance
- Link Whisper – Makes internal linking easy, helps you spot orphan pages, and allows you to view all of your link data in one place
- YARPP – Adds related posts to the end of each blog post to boost visitor engagement and time on site
- RankMath – A great all-round SEO tool covering everything from content optimization to spotting and fixing technical issues
- WP Rocket – A caching plugin that helps improve page speeds and core web vitals
You don’t need to install all these, but choosing at least one from each area is a good idea.
Conclusion
Now that you’ve got a good idea of how to do on-page SEO in WordPress, it’s time to start working through this list. Having your site set up correctly from the get-go will mean that you can focus on creating great content, and soon you should start to see your organic traffic increase.
Check if your site has the same issues.
Run a free audit right now. See your orphaned pages, broken links, and link health score in 60 seconds.
Check My Site